[z] Create Your Own iOS Framework
If you’re new to programming in iOS and are coming from a .Net background (like myself), you may be wondering where all the dlls are.
Well, instead of dlls the platform works in terms Frameworks, which are basically folders thats contain public header files and a binary. Unfortunately, XCode doesn’t natively support the creation of your own Frameworks.
As a control developer, this is kind of a big deal, b/c without frameworks, we have to fall back on creating a static library file. The problem with lib files is they’re a pain to consume. Essentially you add the lib as a reference to your project, and then you have to tell the project where to look for the header files. And thats not a good User Experience.
So how do we get around this limitation?
After doing lots of searching, i stumbled across an awesome open source project on gitHub: iOS-Universal-Framework. The project is basically a project template. You simply install it and now have a new option when creating a project.
So lets take a look at the install process and how to use it:
1. Download the zip file.
2. Make sure you save the file somewhere for future use. B/c its a project template, anytime you update XCode, you’ll have to reinstall the project template. (Don’t worry the install process is really fast)
3. Make sure XCode is completely shut down.
4. Unzip the zip file and navigate to: Real Framework/install.sh
5. If you’re familiar with using Terminal, simply call bash on install.sh If you’re not familiar, you can simply rename the file to install.sh.command and just double click on it
6. Once it starts running it’s going to ask you: Where is XCode installed. If you haven’t touched the default install location of XCode (in Applications) just hit enter
7. Next it will ask to confirm where its going to install. Just type y and hit enter
8. It will ask you for your password, type it in and hit enter
9. After that you should see Process Complete.
10. Now open up XCode and open the New Project window
11. Under iOS select Framework & Library and you’ll see a new option called “Static iOS Framework”
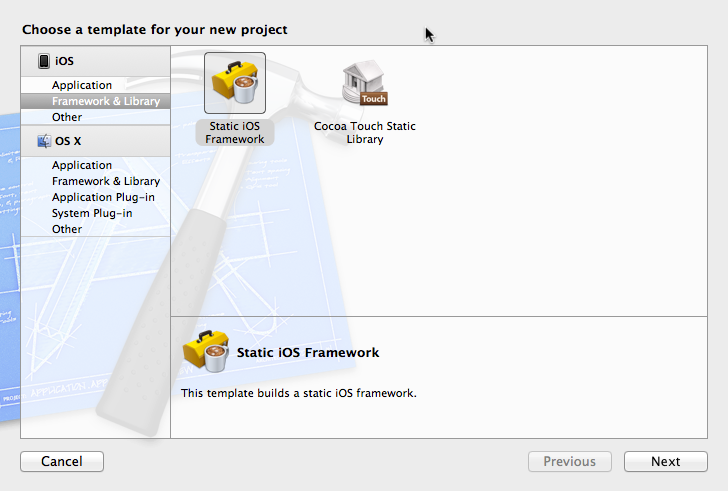
12. Hit Next and name your framework and follow the normal steps for creating a new project.
So, now you have a new framework! But how do you use it?
You’ll basically treat it like any normal project. However, for any API’s you want made public you need to tell it.
Lets walk through an step by step example of a creating a Framework, exposing your public API’s and consuming it!
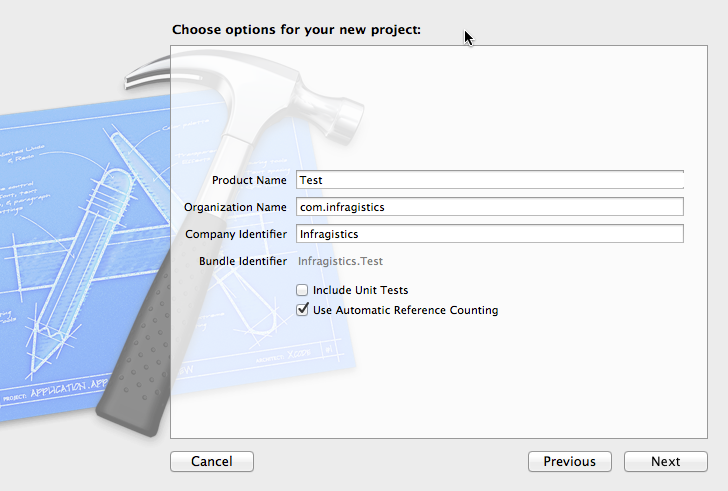
1. Create your framework using the new project dialog:
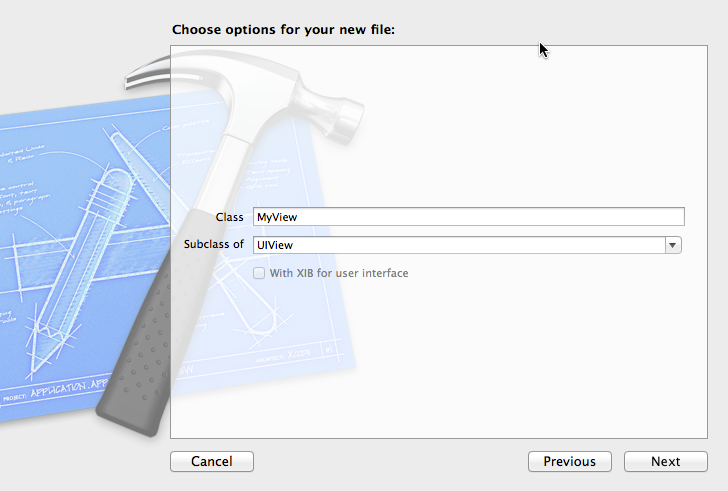
2. You’ll have an empty project now. So lets add a new class. In this case lets create a new UIView and call it MyView
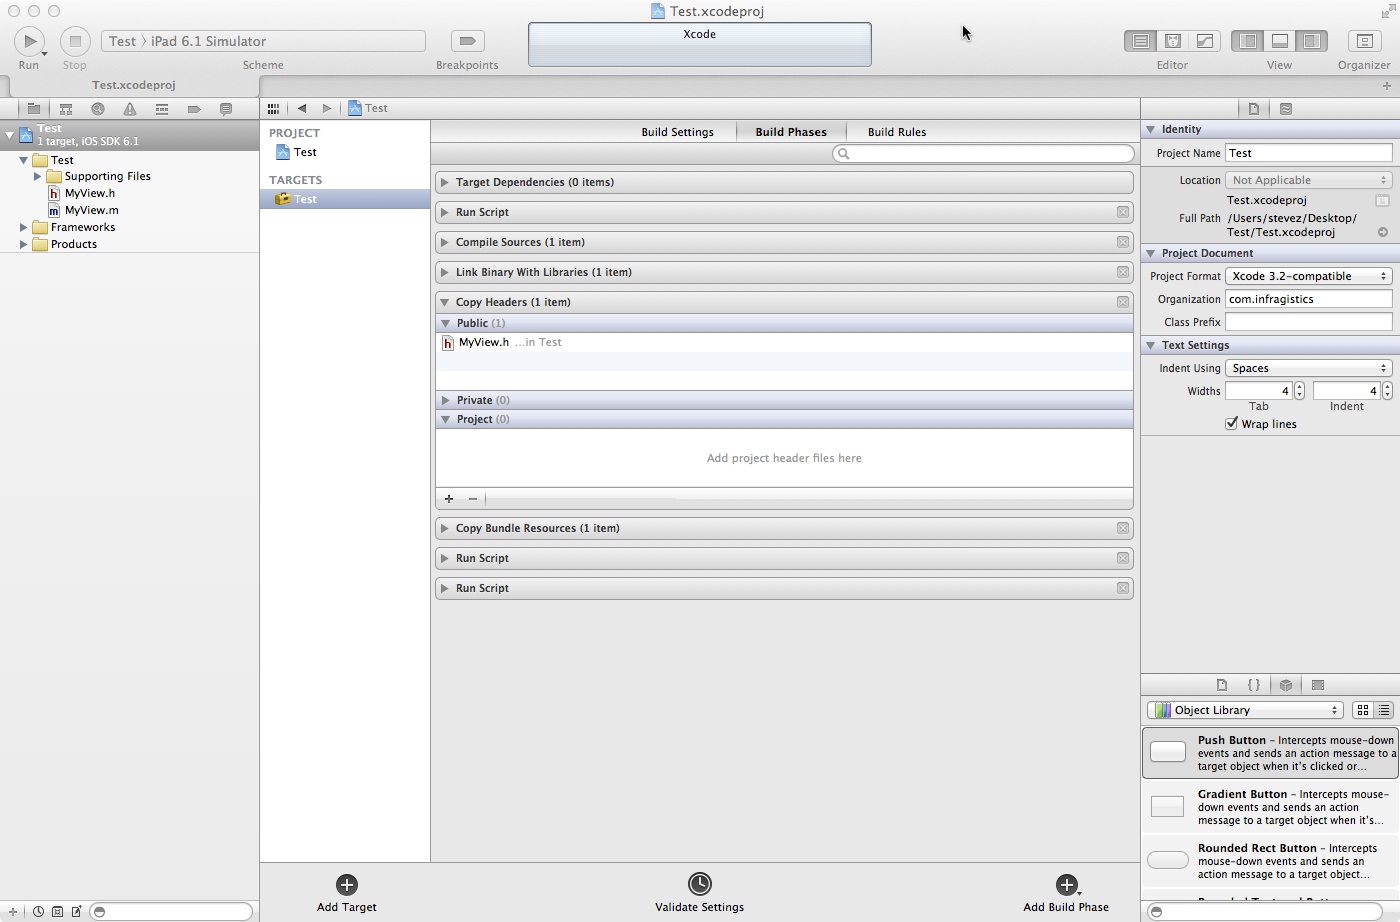
3. Now, since I want these API’s to be available to consumers of this framework, i need to mark the “.h” file as being public. To do that click on the project in the project explorer and select build phases:
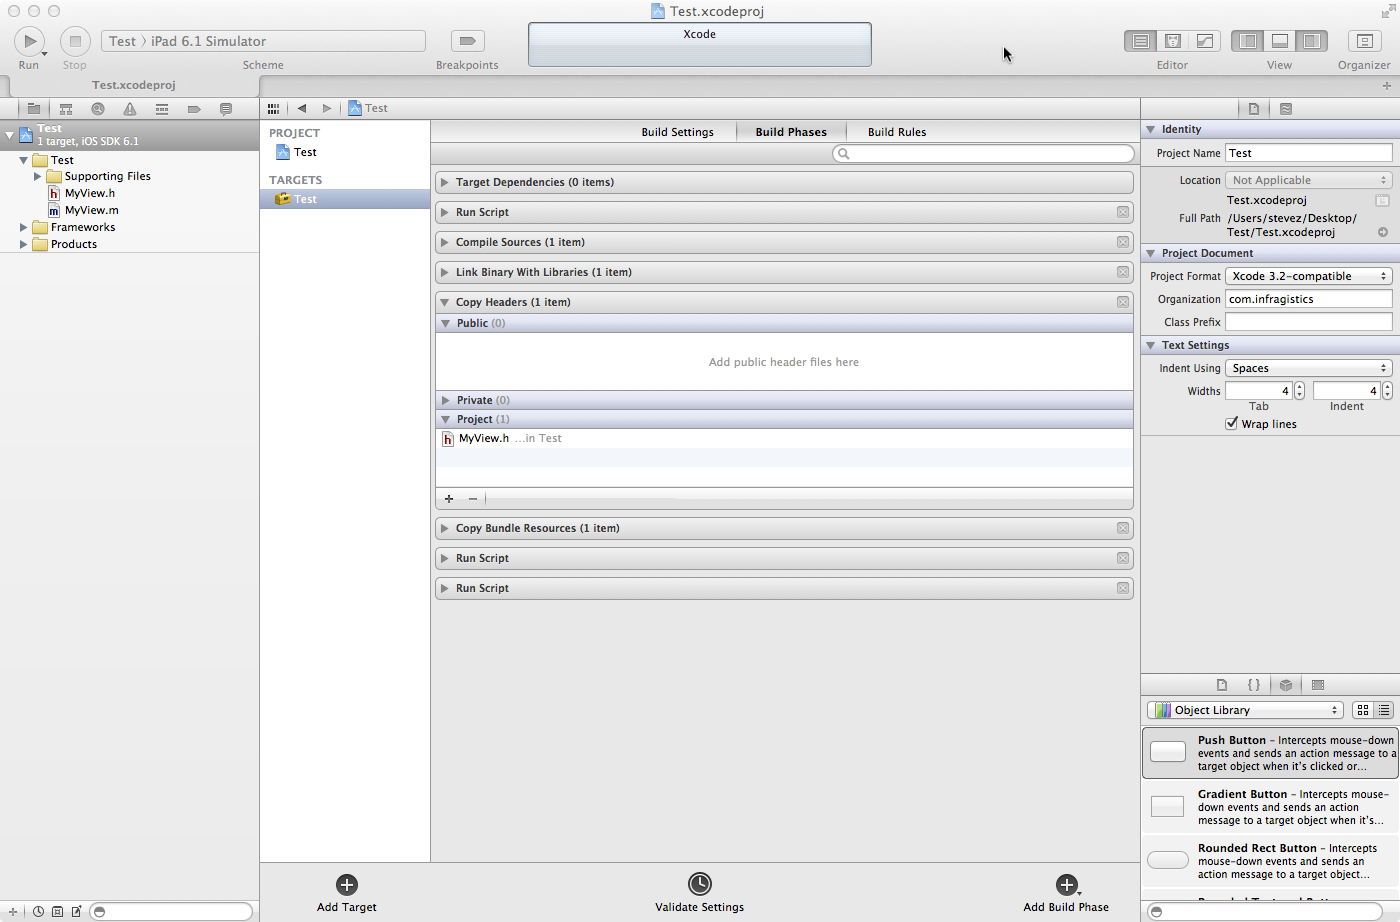
If you expand the Copy Headers section, you’ll see that there are 3 options, Public, Private and Project. By default, whenever you add a new file, it will show up under project. If you want to expose it as public, simply drag the header file from project and place it in public:
4. So now lets just a little bit of code to our class so that it does something.
@implementation MyView
-(id)init
{
self = [super init];
if(self)
{
self.backgroundColor = [UIColor orangeColor];
}
return self;
}
@end
We’ll simply make our View have a orange background color by default.
5. Now this next step is optional, but in my opinion is good practice. If you’ve ever noticed when you use Apple’s default frameworks, the import statement generally looks likes: #import UIKit/UIKit/.h or #import QuartzCore/QuartzCore.h The nice thing about this, is if you know the name of the framework, then you know which header file to reference. And these header files expose ALL the public API’s in framework. So you don’t have to add a bunch of header files.
So lets do this now.
First open the Add New File dialog and add a new Header file:
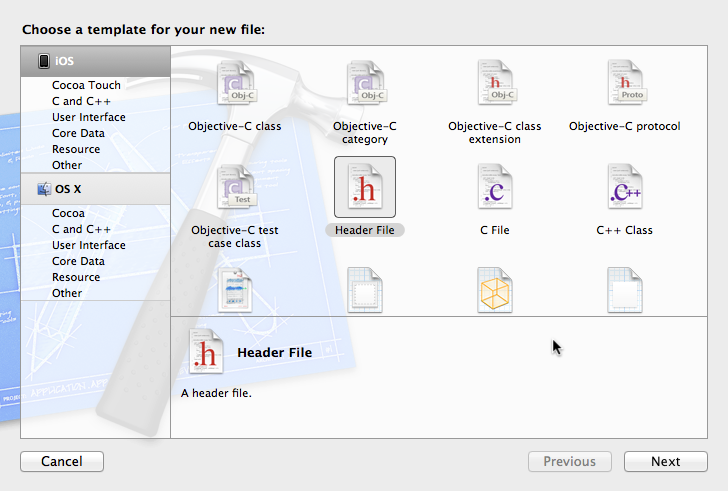
Name the header file the exact same name you named your framework. And inside the header file, add a #import for every public header file in your framework.

Now, DON’T FORGET TO GO TO THE BUILD PHASES AND MARK IT AS PUBLIC!!!!!! (Step 3)
6. Now Build your project, and LETS USE IT!!!
7. Create a new project, for this case we’re just going to create a Single View Application called MyApp.
8. Once the project its created click on the project and scroll down to “Linked Frameworks and Libraries Section” and click the little plus button:
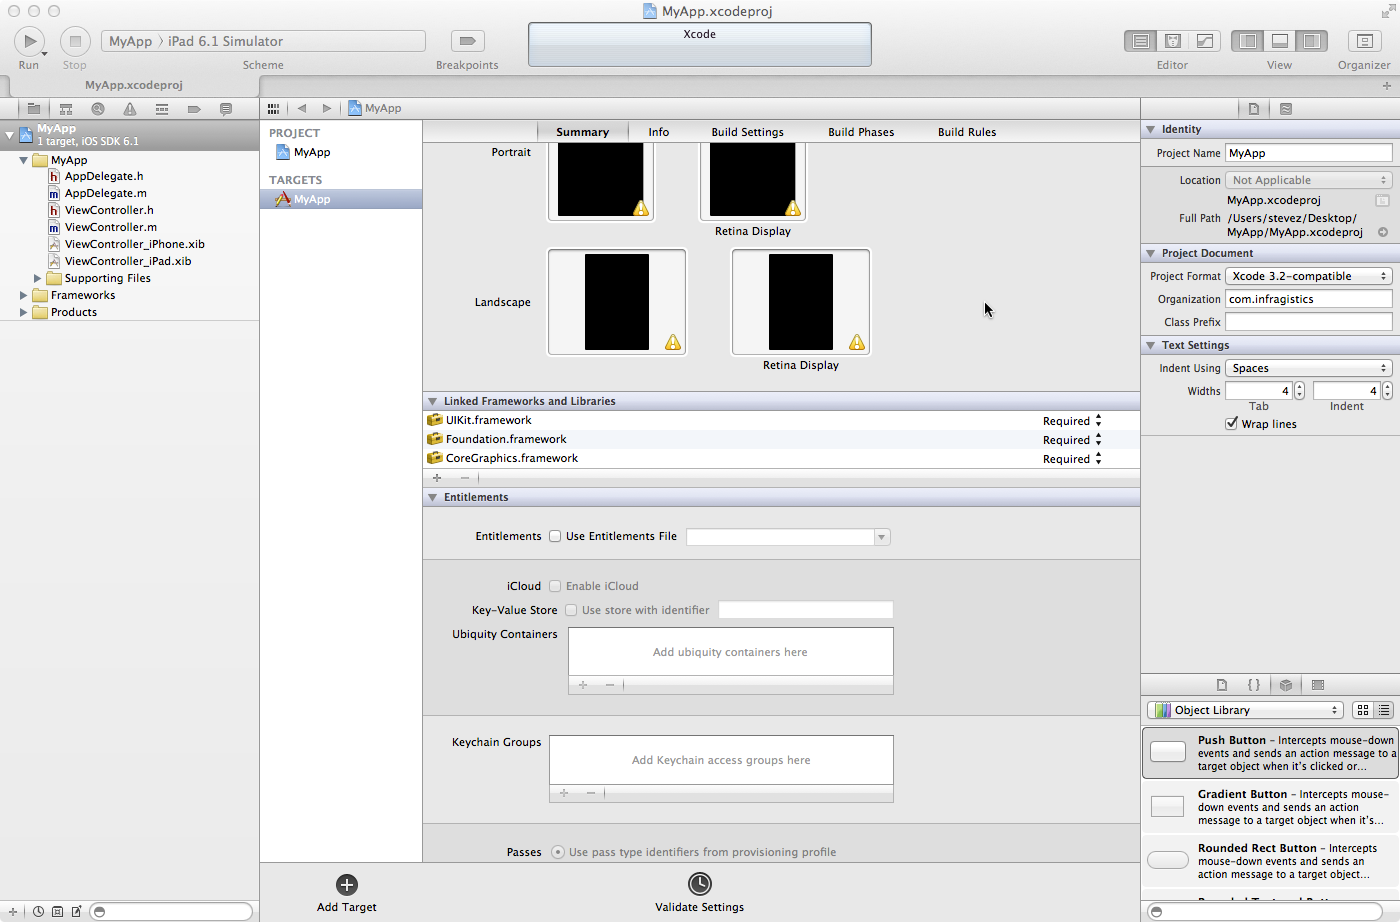
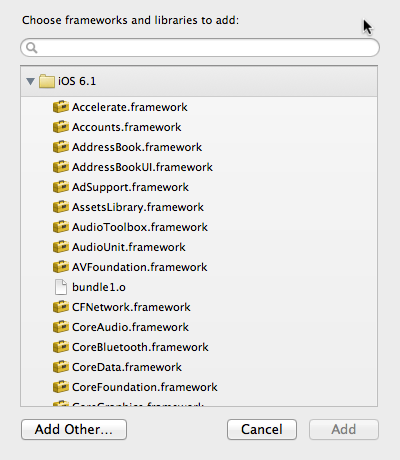
Now navigate to your framework by clicking the “Add Other” button:
Time to write some code!
9. First open up the ViewController.m file and write your code:
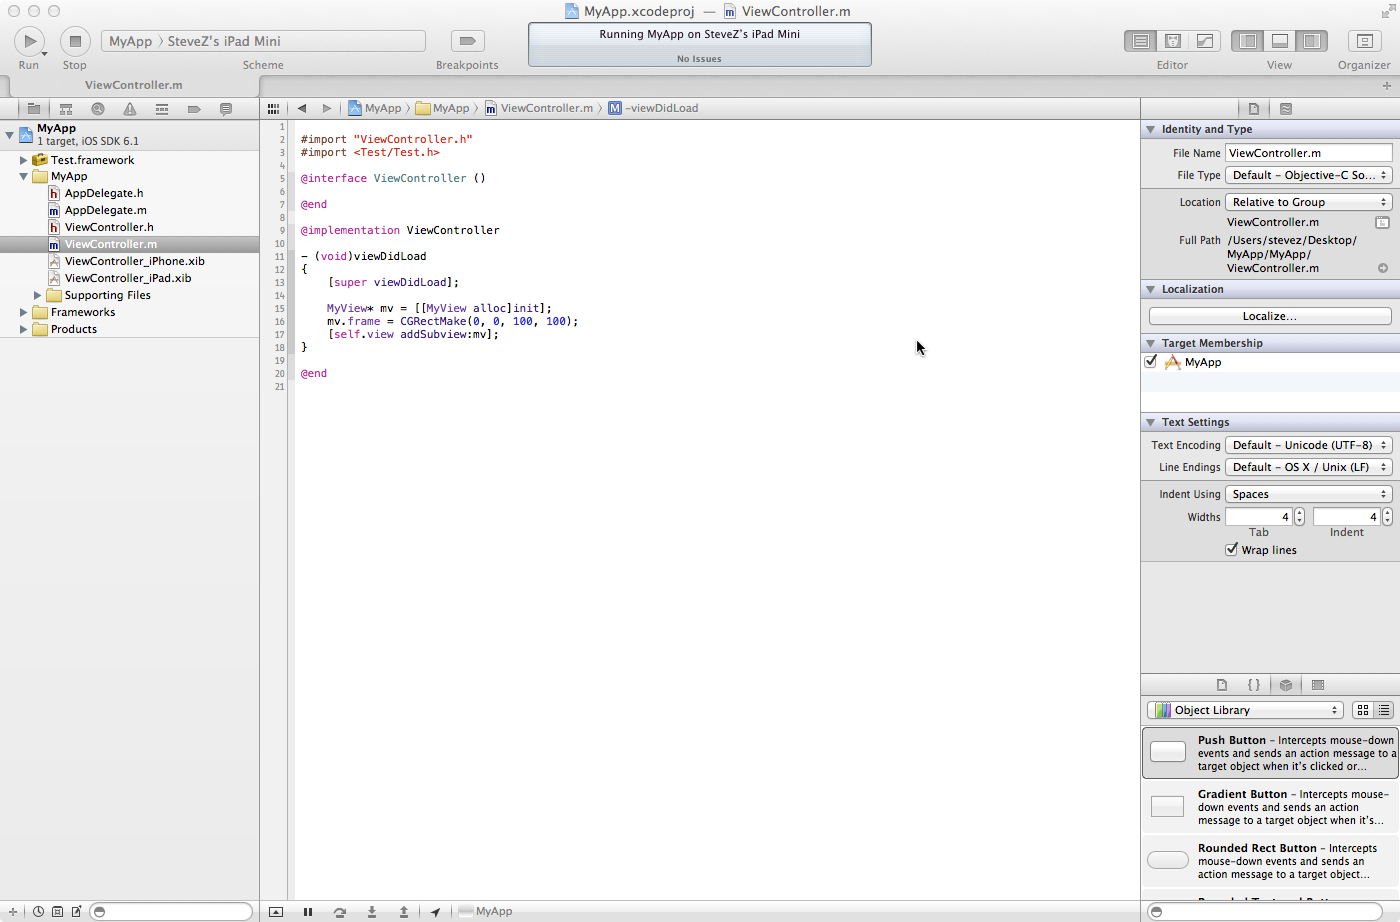
10. Run your project and you should see the following:
And there you go! You’ve written a framework which you can now share between multiple projects and teams!
As always i hope this was helpful.
For more tips ans trick, check out my blog.
By Stephen Zaharuk (SteveZ)